

A waiver is a mechanism that allows you to bypass specific controls from a compliance scan. A Waiver will enable you to provide details about the exception, including expiration (if applicable) and justification.
Benefits of using Waivers:
- Justifies an excepted control (vs the older skip control mechanism)
- Promotes a culture of introspection; operators are encouraged to comply with all controls if not waived with a permanent justification.
- You can still “run” a control to track compliance progress without impacting overall posture.
- When running the
inspec execcommand by using the--waiver-fileswitch. - Declared in the cookbook’s attributes file.
A waiver file contains the following pieces of information:
- Control ID_Name - the ID and Title of the control to be waived
- Expiration Date - the date when the waiver is set to expire
- Waiver Justification (optional) - a way to allow users to justify the waiver (i.e. why the given control must be waived).
- Skip run switch - allow users to skip the evaluation of the waived control.
Difference between a Skipped and Waived control?
- Skipped controls are not evaluated/run
- Waived controls that are
run: falseare not evaluated/run
Setting up the Environment
Within your cookbook, execute the command $ chef generate waiver <name of the file>. The output tells you that a new directory is created for waiver, under compliance folder.

The command above will create a new yml file. You can edit this file or create a new for compliance scanning.
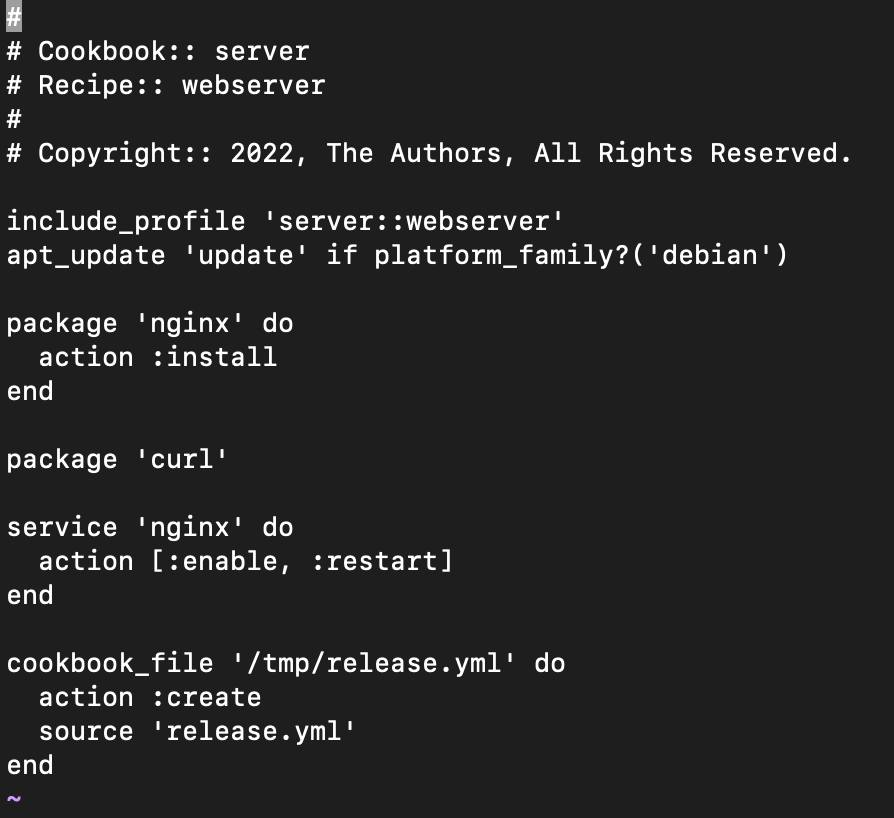
- Recipe: The recipe below will install and start the nginx server on the remote node. Along with installation, it will push the waiver
release.ymlfile to the remote node under the/tmpdirectory.
Note: Waiver file should be present in the client node for it to be executed and applied.
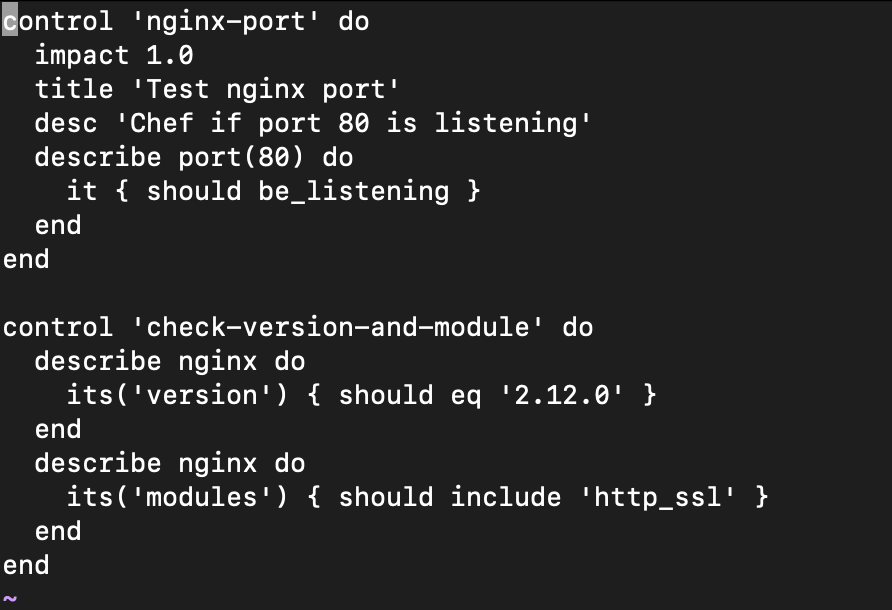
- Example: Below, compliance has two controls. The first will check whether port 80 is listening, and the second will contain the version and the modules, respectively.
- Waiver – release.yml file
Below waiver file will exempt (waive off) the control nginx-port when there is a client run until the expiration date.

Note that the Control ID should match that of the waiver and control file. In the above example, the control ID and waiver is nginx-port.
- Edit the attributes file to include the waiver.

Note: You should not place your waivers in /tmp. Every organization will have their own standards, we are using /tmp as an example.
$ cookstyle –a $ knife cookbook upload <cookbook-name>, but the more modern way is to use Policyfiles. $ chef install Policyfile.rb, which creates a Policyfile.lock.json file, then use $ chef push prod Policyfile.lock.json to bundle everything and send it to your Chef server. $ inspec exec compliance/profiles/<profile_name>/controls/<control.rb> --waiver-file compliance/waivers/<waiver-file.yml>
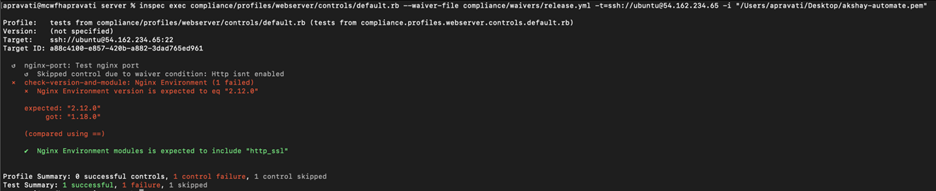
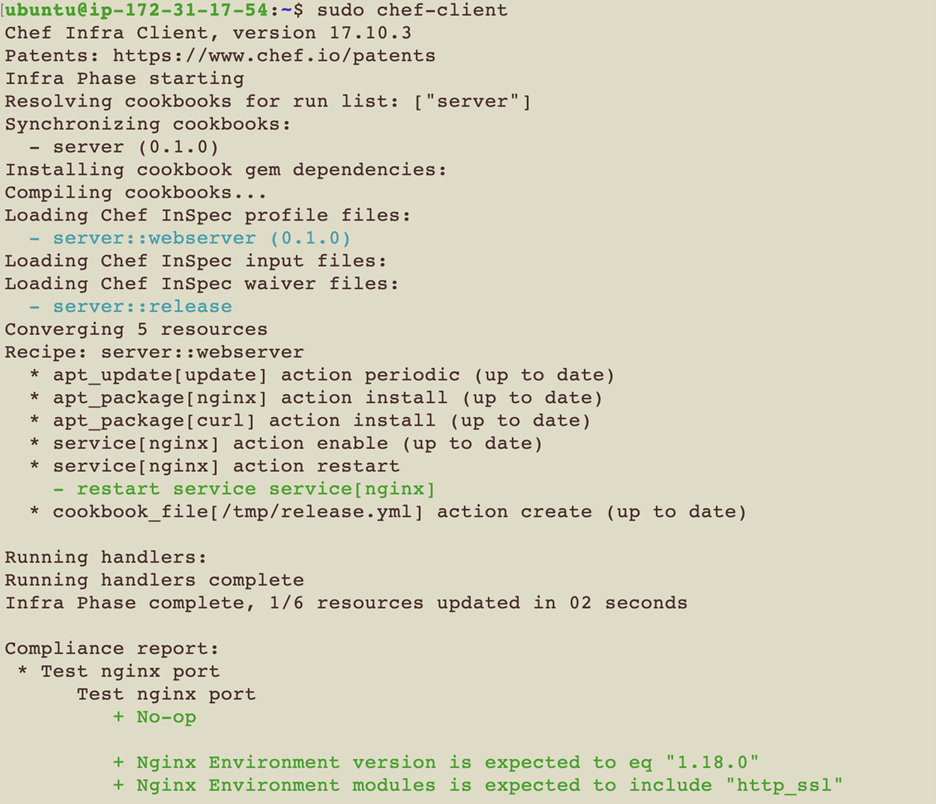
nginx-port is skipped,and the other two controls are executed. $ sudo chef-client command will execute the cookbook in the target node along with all the recipes, compliance and waivers files.
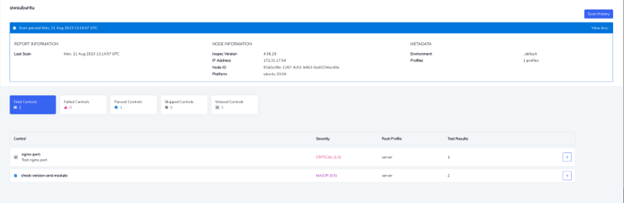
You can confirm the results from the Automate UI. As you can see the control nginx-port is under waived control.

Conclusion